I hardly make enough to be worth posting these days, and even less rarely am I proud of what I made. Amazingly, I both made a bunch this last month, and was proud of it, so I thought I'd share. I also want to ask some advice... First, the sharing, though.
ETA: Look, it's a sneak peak! Please to be for clicking the LJ cuts!

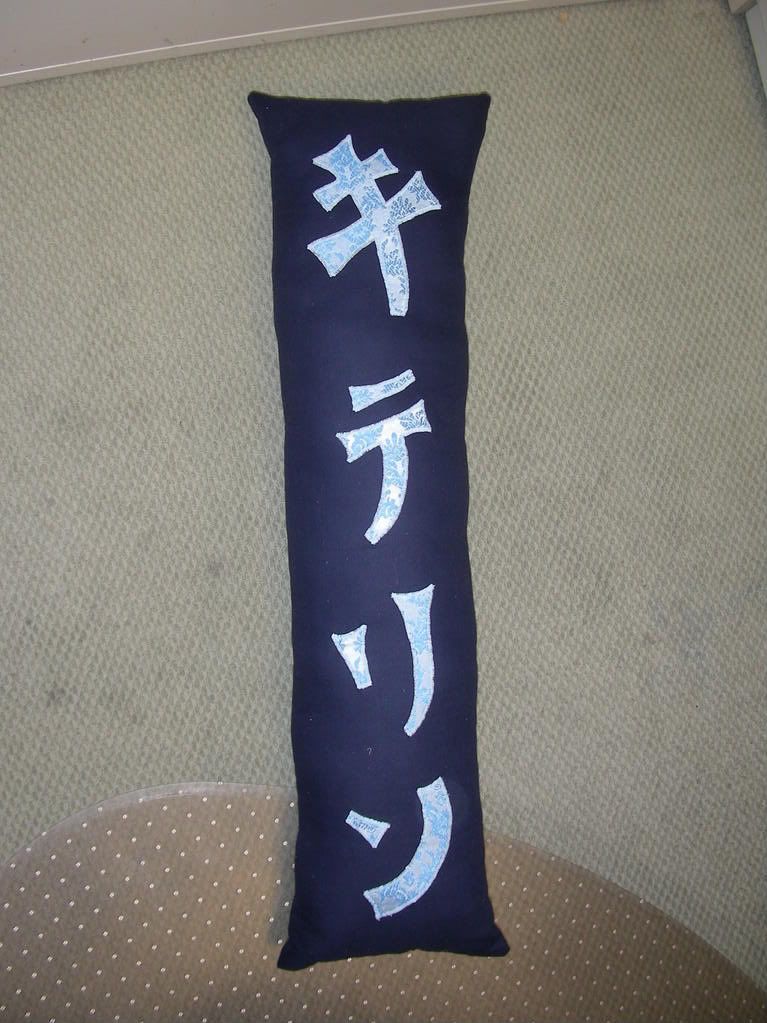
Getting as minimalist as I can, let me just give the background story. I'm a member of![[livejournal.com profile]](https://www.dreamwidth.org/img/external/lj-community.gif) geek_chic_swaps. Last month's theme was, basically, the Japanese language. I decided to make a pillow with my partner's name in katakana (Japanese written language for foreign words), and then send her items that begin with each of the kata in her name.
geek_chic_swaps. Last month's theme was, basically, the Japanese language. I decided to make a pillow with my partner's name in katakana (Japanese written language for foreign words), and then send her items that begin with each of the kata in her name.
First, the pillow:
 ~*~
~*~ 
It's very tall and narrow, since it reads top to bottom. It reads Ki-Te-Ri-N. Her username is Caitirin. It's a simple pillow, stuffed as fully as I dared to still allow it to be comfortable. I used... some fabric I had, a sort of... not suiting material but just about? It's fairly soft, a smidge stretchy but nothing to speak of. ::shrugs:: I don't know much about fabrics. The letters are basically appliceed (sp) on with Wonder Under, then zigzag stitched around like you'd find on a letter jacket. The material is some sort of curtain fabric, with a kinda rubbery white backing to it. It worked well, though my machine fought with me the whole way. I didn't take a picture of the bottom, because it sucked... I apparently have no clue how to "properly" close a pillow.
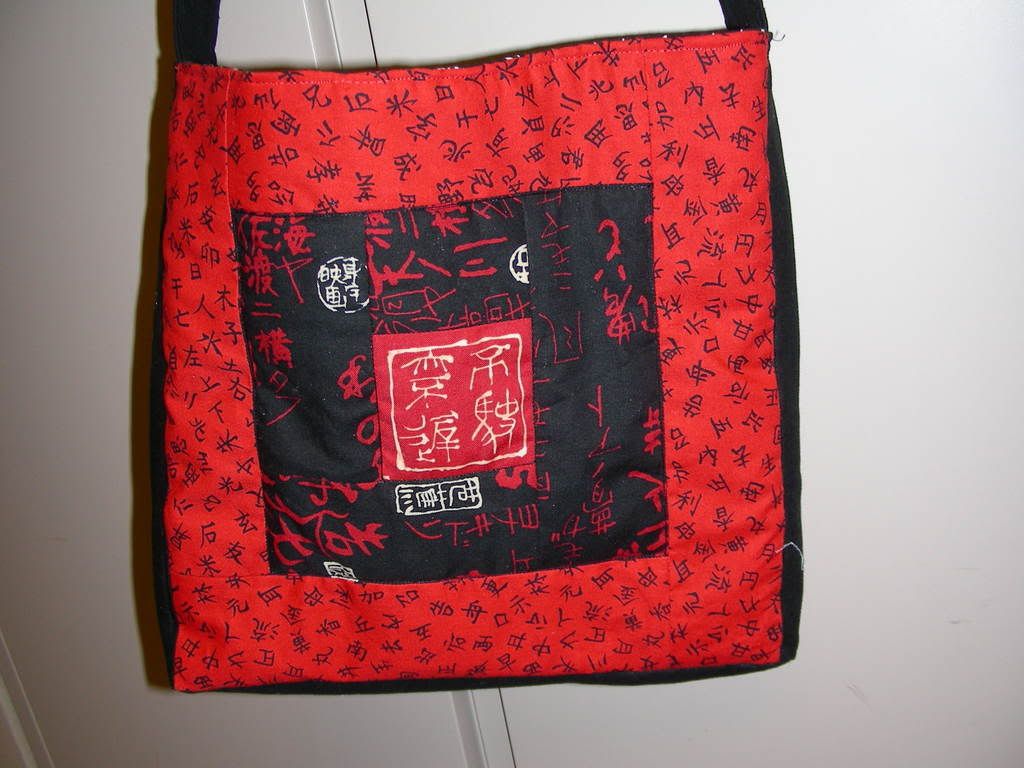
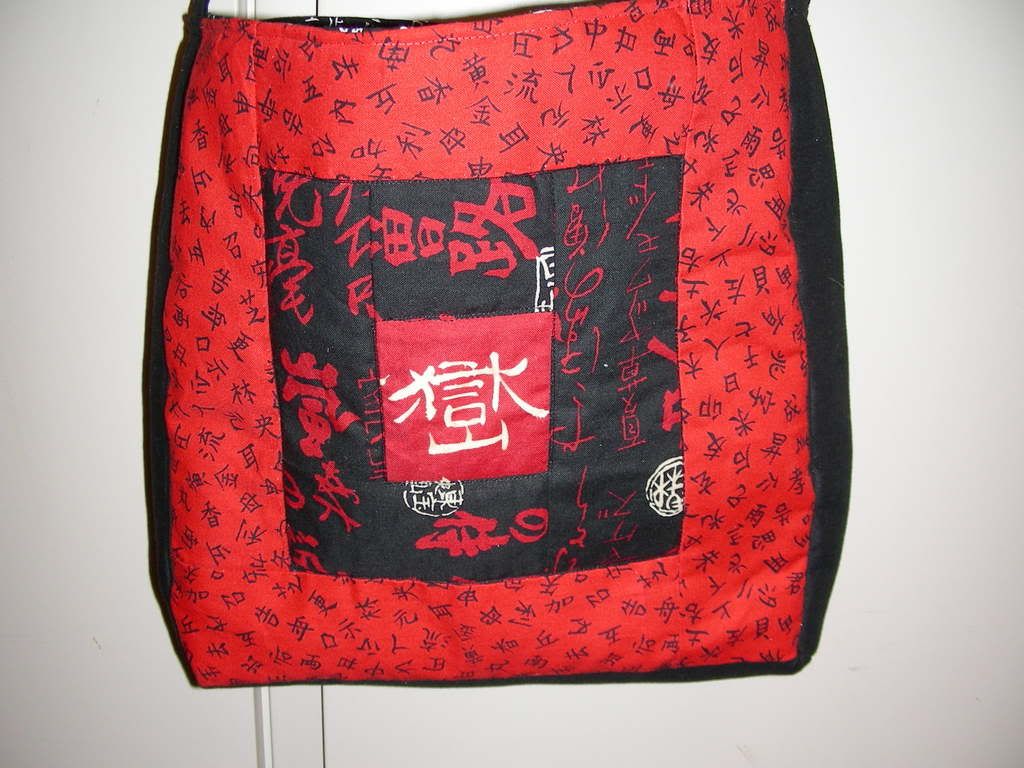
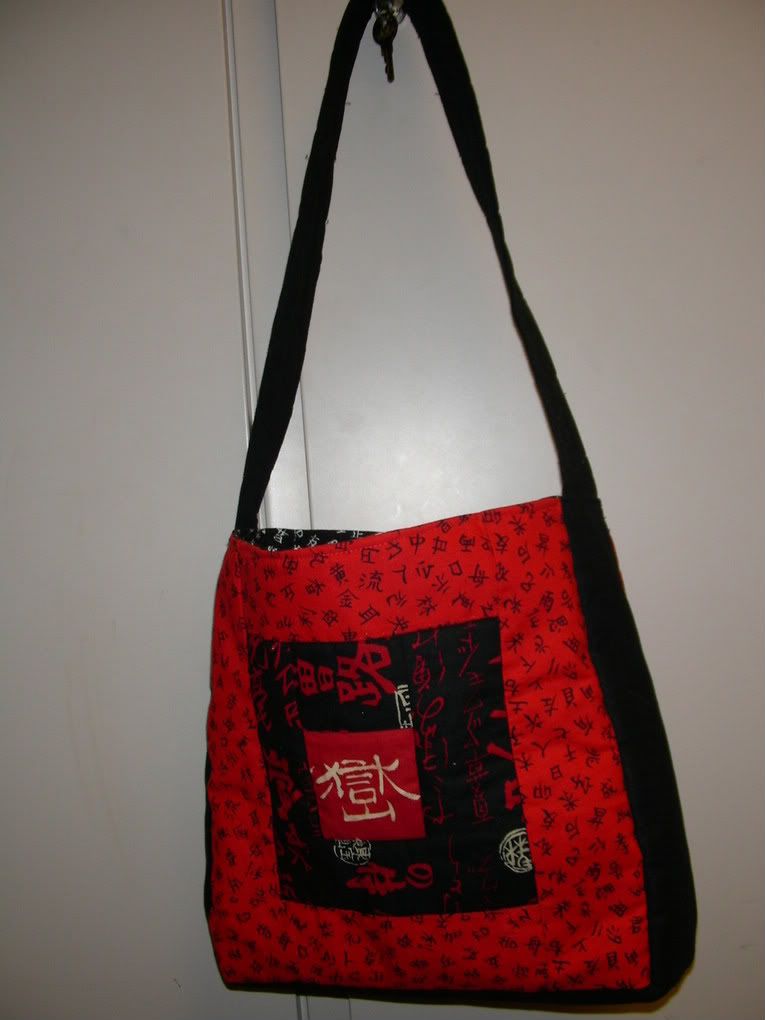
Next, I used the kata Ki and ran with it, finding the word quilt used this kata. But I wasn't about to make a full quilt, having never quilted before in my life, only having a month, having limited funds, and wanting to make sure I had time to finish the other projects as well. That said, I decided I'd make a huge quilted square, and then turn that into a purse/tote. So it became two squares (one for either side, of course), and a whole quilted purse. I could have done better, but this is probably the item I was most proud of!
 ~*~ ~*~
  ~*~
~*~  ~*~
~*~ 
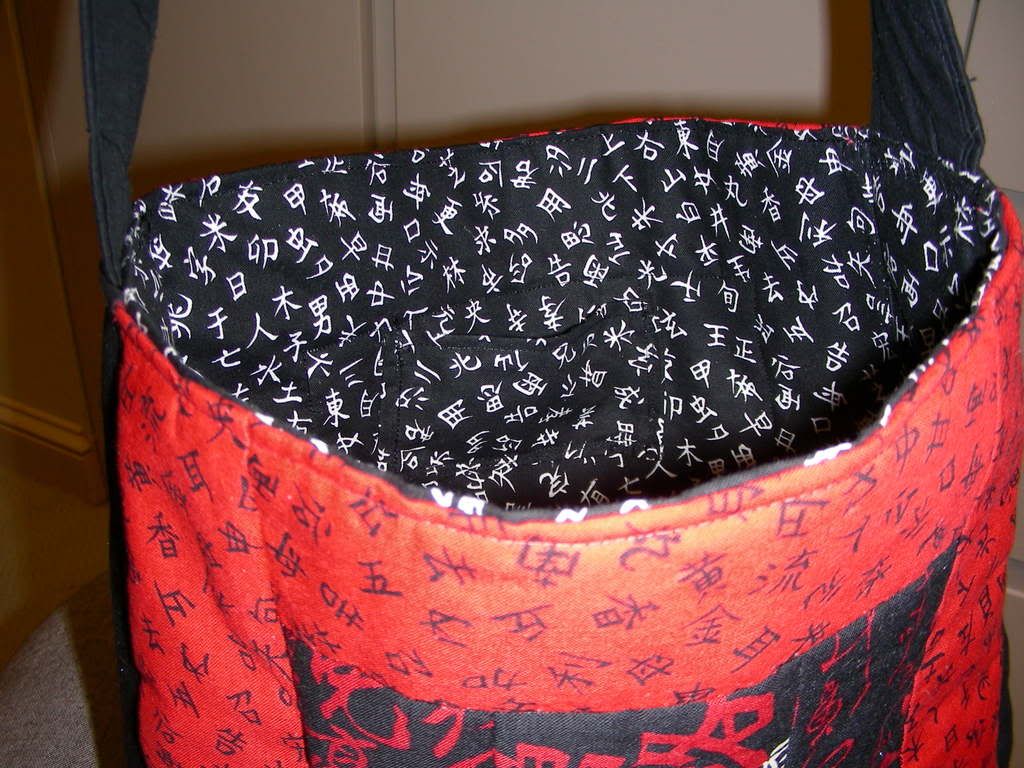
What you can't see is the construction. I basically did the 'make the outside, make the lining, then sew the two together' technique. That's great and all, but if you're quilting the bag, it makes things very difficult if your cuts are even a fraction of an inch off. I'll be asking for suggestions at the end of this, and this is one of the big things I'm going to ask about, so remember it. Hah!
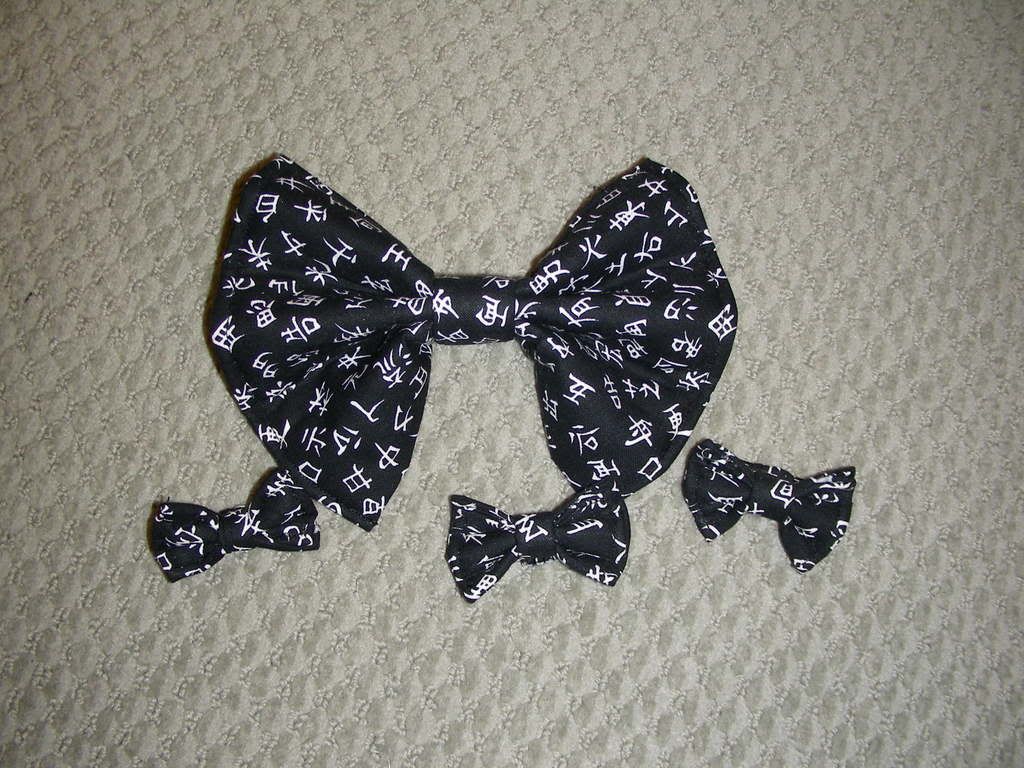
Using some of the fabric I had left over from the lining of the bag, I decided to make some hair ribbons. See, Te was actually used for Theme Music, which means she got a couple personally mixed cds, so that has no place here. We've already moved on to Ri. Please keep up. So... ribbons. ^_~
 ~*~
~*~ 
I used the same fusible quilter's batting I used on the purse, and again I only fused... one side to the fabric. Bad quilter! I love making bows like this. I could make them all day. Think of those little 'oragami fans' you would make in school to keep cool? Now pinch the middle. There you go, you have a bow! ::laughs:: The big one is on a normal clip, and the little ones are on small clips I usually use for my horns. They were a pain to keep on there, but a bit of E6000 and a ton of stitching did the trick.
Finally, we come to N. There weren't many words. I finally fell to making a necklace, though I admit that I have little to no experience with beading. I'm probably least proud of this piece, but then again, I know my own weaknesses. I am crap for jewelry making.
 ~*~
~*~ 
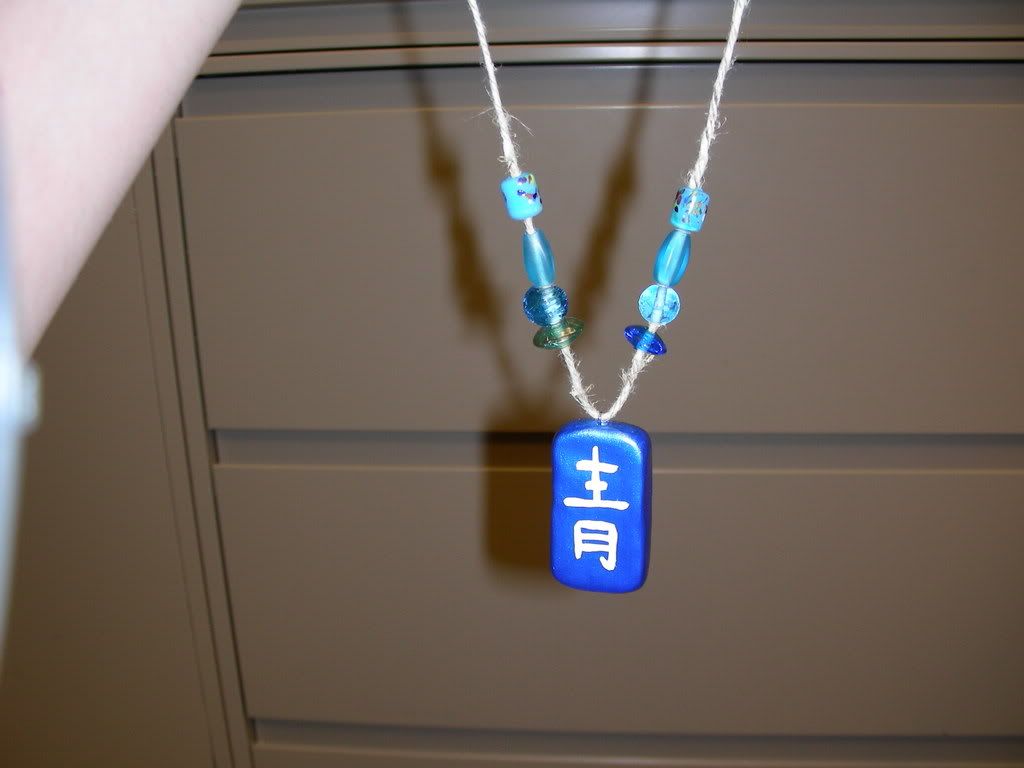
The pendant is made from sculpy (with a jewelry finding making the loop baked in). You can see I didn't smooth out the tinfoil before putting it down... that's why the back has that awful diagonal crease. Boo. I painted it blue, then hand-painted the kanji for "blue" on the pendant. The cord is just plain hemp, but I had to strip down one of the strings that made up the hemp, because it was too thick to bead originally. Glass beads I bought... in some strange mixed bag thing at the craft store. I tied an adjustable knot on the end, and it was done. Nothing fascinating, as you can well see.
And that's all I have to share today. Maybe one day I'll take some good pictures and share the horns that I sell. I really do need to make a website for them, though. ::taps her chin:: Though I wonder if it's worth my time. There are several people selling similar on etsy, but generally with higher prices or different mediums. I've never seen anyone do them quite as I do. ::throws her hands in the air:: Anyway, I wasn't here to ask advice about that! Now, on to what I need advice on, pretty please with cherries and kanji on top...
You see, like you see above, I'm trying to make some spare cash from crafting. I figure, I enjoy it, people like them, why not sell them. Right? Well I've gotten a lot of people telling me that I should sell bags like the purse/tote I made for my swap partner above. The thing is, I really don't know if there would be interest. For that matter, I don't even know if it would be worth my time. I mean, what would I sell them for and how would that compare to how much I'm spending in time and materials? Things like that? Would I market them as quilted handbags? Totes? Bento carriers (ingenious idea by a friend to fill a niche market)?
Beyond that, there's construction. It took me quite a bit of time, but I'd never quilted before in my life, and never really completed a purse either, for that matter. I think I could do it more easily than I did, by not using that nestling method. In other words, construct it as though it was not a lined purse. Use the fusible quilter's batting between the lining fabric and the outer fabric, cut to size of each piece of the bag. Then quilt these pieces before construction. During construction, so raw edges weren't showing everywhere, maybe use french seams that I make sure are on the lined/inner side, and then tack them down with a careful stitch so they don't catch on things and still look good?
The only problem I'd really see are those french seams/raw edges, and putting in the strap. I assume, though, that I can easily peel the fabric from the batting before hemming and insert the strap there, if I really wanted, but then I wouldn't be able to turm the hem there except by turning it inward, which would be different than the edge where I would (I assume) fold it over, given the construction style. After all, hemming the bag was the hardest part for me, because the lining was black while the outside was red. If you look closely, you'll see that the hem actually has a black dot every so often, because I used a red topthread and a black bobbin. That method was, obviously, courting disaster.
Suggestions? Ideas? Feedback? I'm up for it all. I want constructive criticism. I'm not the best of the best, and I know it, but I'll be damned if I won't strive for the best... and keep trying my best. Thank you all for your time.
PS: I may cross-post this to a community or two. I don't know yet. I'm considering it. If you think there's somewhere that I should post this, please, let me know! And if you see this somewhere else you frequent, please, forgive me. <3
ETA: Look, it's a sneak peak! Please to be for clicking the LJ cuts!
Getting as minimalist as I can, let me just give the background story. I'm a member of
First, the pillow:
 ~*~
~*~ 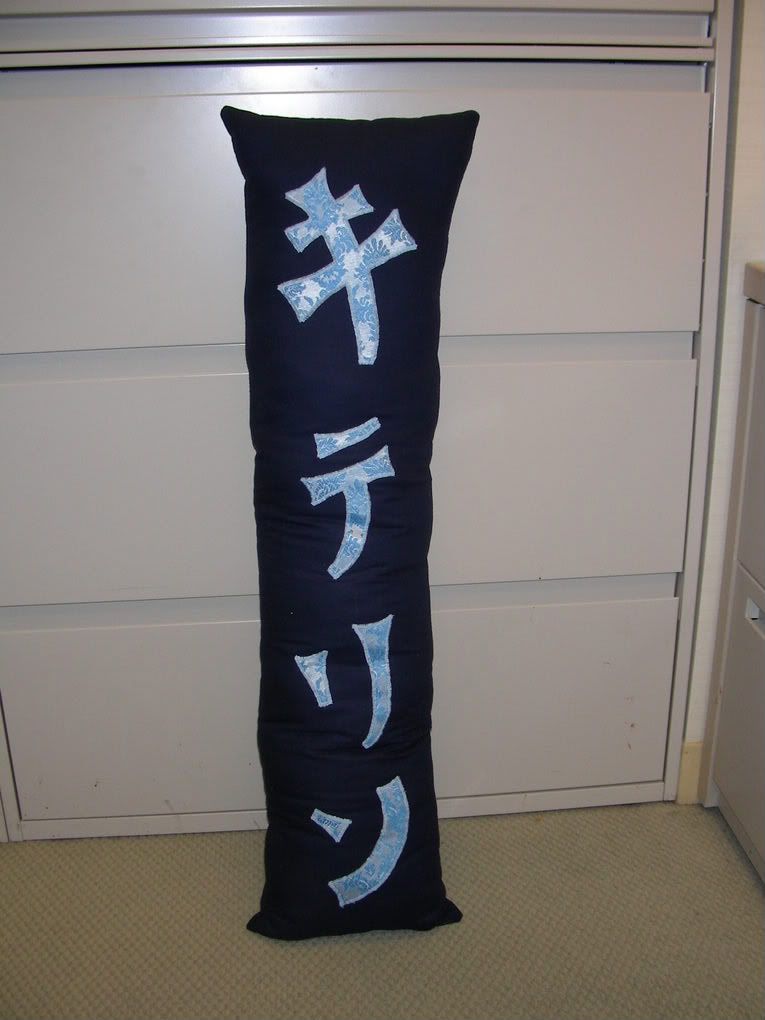
It's very tall and narrow, since it reads top to bottom. It reads Ki-Te-Ri-N. Her username is Caitirin. It's a simple pillow, stuffed as fully as I dared to still allow it to be comfortable. I used... some fabric I had, a sort of... not suiting material but just about? It's fairly soft, a smidge stretchy but nothing to speak of. ::shrugs:: I don't know much about fabrics. The letters are basically appliceed (sp) on with Wonder Under, then zigzag stitched around like you'd find on a letter jacket. The material is some sort of curtain fabric, with a kinda rubbery white backing to it. It worked well, though my machine fought with me the whole way. I didn't take a picture of the bottom, because it sucked... I apparently have no clue how to "properly" close a pillow.
Next, I used the kata Ki and ran with it, finding the word quilt used this kata. But I wasn't about to make a full quilt, having never quilted before in my life, only having a month, having limited funds, and wanting to make sure I had time to finish the other projects as well. That said, I decided I'd make a huge quilted square, and then turn that into a purse/tote. So it became two squares (one for either side, of course), and a whole quilted purse. I could have done better, but this is probably the item I was most proud of!
 ~*~ ~*~
  ~*~
~*~  ~*~
~*~ 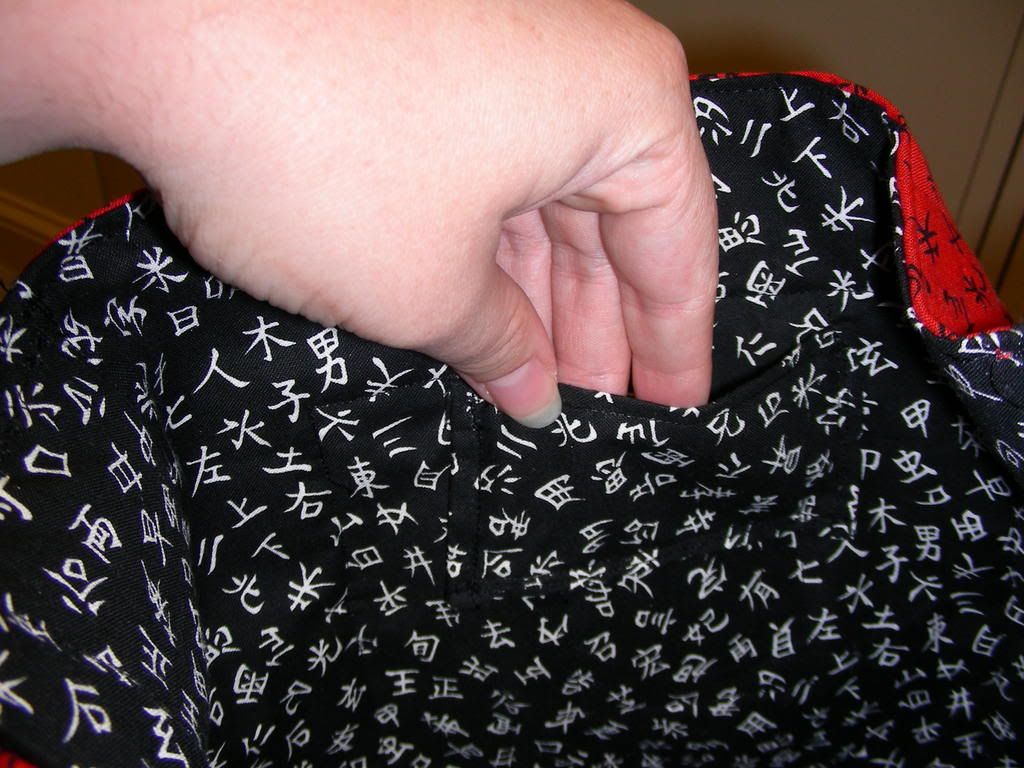
What you can't see is the construction. I basically did the 'make the outside, make the lining, then sew the two together' technique. That's great and all, but if you're quilting the bag, it makes things very difficult if your cuts are even a fraction of an inch off. I'll be asking for suggestions at the end of this, and this is one of the big things I'm going to ask about, so remember it. Hah!
Using some of the fabric I had left over from the lining of the bag, I decided to make some hair ribbons. See, Te was actually used for Theme Music, which means she got a couple personally mixed cds, so that has no place here. We've already moved on to Ri. Please keep up. So... ribbons. ^_~
 ~*~
~*~ 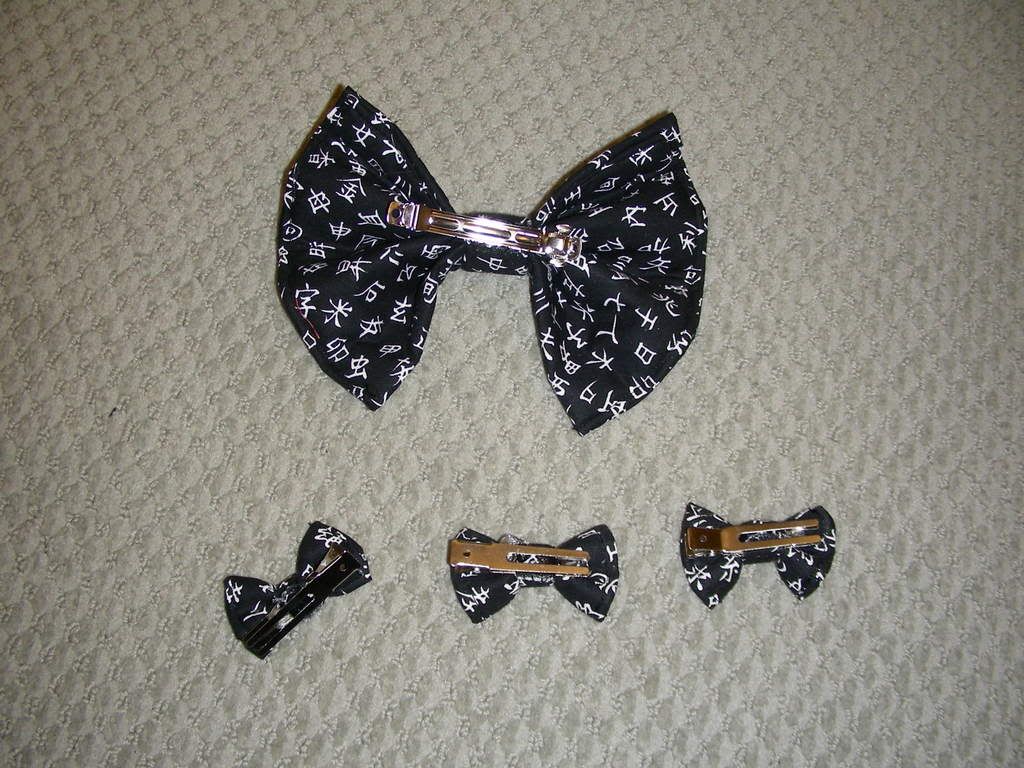
I used the same fusible quilter's batting I used on the purse, and again I only fused... one side to the fabric. Bad quilter! I love making bows like this. I could make them all day. Think of those little 'oragami fans' you would make in school to keep cool? Now pinch the middle. There you go, you have a bow! ::laughs:: The big one is on a normal clip, and the little ones are on small clips I usually use for my horns. They were a pain to keep on there, but a bit of E6000 and a ton of stitching did the trick.
Finally, we come to N. There weren't many words. I finally fell to making a necklace, though I admit that I have little to no experience with beading. I'm probably least proud of this piece, but then again, I know my own weaknesses. I am crap for jewelry making.
 ~*~
~*~ 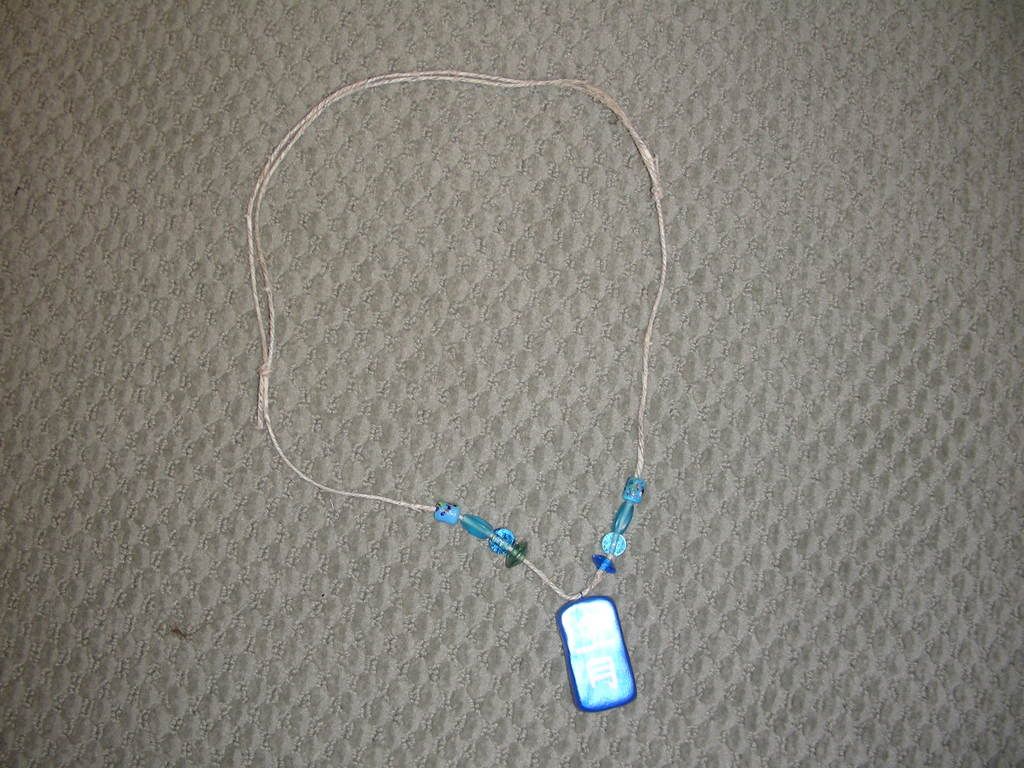
The pendant is made from sculpy (with a jewelry finding making the loop baked in). You can see I didn't smooth out the tinfoil before putting it down... that's why the back has that awful diagonal crease. Boo. I painted it blue, then hand-painted the kanji for "blue" on the pendant. The cord is just plain hemp, but I had to strip down one of the strings that made up the hemp, because it was too thick to bead originally. Glass beads I bought... in some strange mixed bag thing at the craft store. I tied an adjustable knot on the end, and it was done. Nothing fascinating, as you can well see.
And that's all I have to share today. Maybe one day I'll take some good pictures and share the horns that I sell. I really do need to make a website for them, though. ::taps her chin:: Though I wonder if it's worth my time. There are several people selling similar on etsy, but generally with higher prices or different mediums. I've never seen anyone do them quite as I do. ::throws her hands in the air:: Anyway, I wasn't here to ask advice about that! Now, on to what I need advice on, pretty please with cherries and kanji on top...
You see, like you see above, I'm trying to make some spare cash from crafting. I figure, I enjoy it, people like them, why not sell them. Right? Well I've gotten a lot of people telling me that I should sell bags like the purse/tote I made for my swap partner above. The thing is, I really don't know if there would be interest. For that matter, I don't even know if it would be worth my time. I mean, what would I sell them for and how would that compare to how much I'm spending in time and materials? Things like that? Would I market them as quilted handbags? Totes? Bento carriers (ingenious idea by a friend to fill a niche market)?
Beyond that, there's construction. It took me quite a bit of time, but I'd never quilted before in my life, and never really completed a purse either, for that matter. I think I could do it more easily than I did, by not using that nestling method. In other words, construct it as though it was not a lined purse. Use the fusible quilter's batting between the lining fabric and the outer fabric, cut to size of each piece of the bag. Then quilt these pieces before construction. During construction, so raw edges weren't showing everywhere, maybe use french seams that I make sure are on the lined/inner side, and then tack them down with a careful stitch so they don't catch on things and still look good?
The only problem I'd really see are those french seams/raw edges, and putting in the strap. I assume, though, that I can easily peel the fabric from the batting before hemming and insert the strap there, if I really wanted, but then I wouldn't be able to turm the hem there except by turning it inward, which would be different than the edge where I would (I assume) fold it over, given the construction style. After all, hemming the bag was the hardest part for me, because the lining was black while the outside was red. If you look closely, you'll see that the hem actually has a black dot every so often, because I used a red topthread and a black bobbin. That method was, obviously, courting disaster.
Suggestions? Ideas? Feedback? I'm up for it all. I want constructive criticism. I'm not the best of the best, and I know it, but I'll be damned if I won't strive for the best... and keep trying my best. Thank you all for your time.
PS: I may cross-post this to a community or two. I don't know yet. I'm considering it. If you think there's somewhere that I should post this, please, let me know! And if you see this somewhere else you frequent, please, forgive me. <3