Rounded zipper How - To
Sep. 12th, 2011 12:02 pmSince I lost my last camera pouch, and got myself a nice new free phone for switching to Verizon, i decided to try something that I've wanted to attempt for a long time. Zippers have begun to lose their terrorizing hold on me, so this morning i attempted a quick craft before heading out the doors to nanny my cute little D.
I've been wanting to try a pouch this shape with a zipper enclosure.

Back then i haven't gotten over zipper phobia.
10 or more zippered pouches later, i think i am ready.
Apologies for cross-postings!
First here are all the supplies you need:
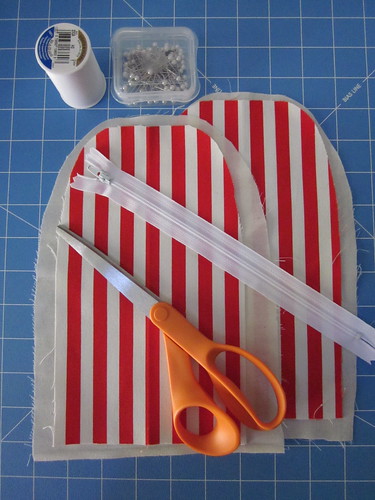
Spool of thread (your desired color)
A pair of scissors
Pins
Zipper (mine is 8")
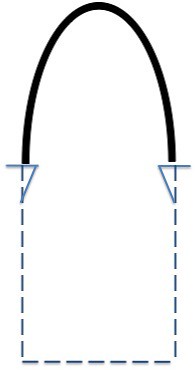
Drafted paper pattern (mine measures 7" tall x 5.5" wide)
2 pcs of outer fabric
2 pcs of inner lining
Cut out the last 2 items from your drafted pattern.
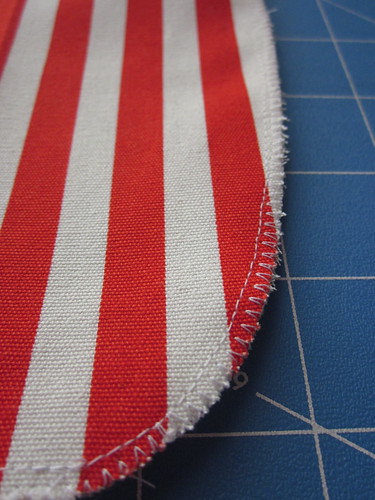
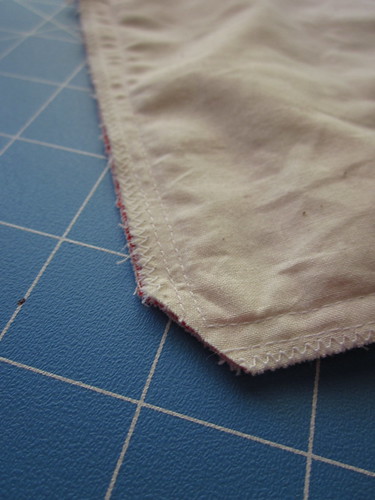
1. Pin outer fabric and inner lining together, wrong sides together. Sew running stitch around edges. Repeat with other side. Serge or zigzag the edges to prevent from fraying.
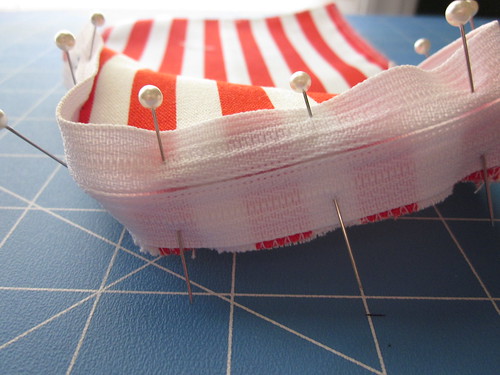
2. Pin zipper around the rounded edge of the pouch carefully. To make sure it's centered, i marked the center of the pouch and the center of the zipper, lined them up and started pinning outwards from the center. Make sure you lay the zipper face down on the right side of the outer fabric. Sew close to zipper teeth. Repeat with other side.
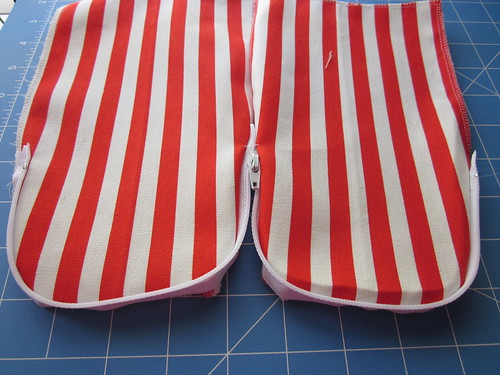
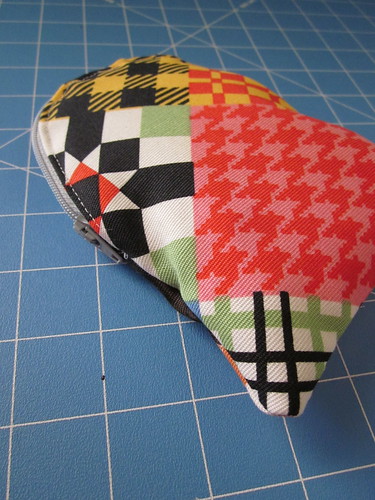
3. You will end up with this when the zipper is open.
4. To prevent the zipper from catching the fabric when you zip and unzip the pouch, press and sew the edges between the fabric and the zipper on the right side, as seen above. Repeat with other side. I forgot to do it with my pouch, but i thought i'd better add in this step in this tutorial.
5. Leave the zipper open midway. Line the two sides (right sides together) so that all ends match. Pin. Carefully sew around the 3 sides that is not lined with the zipper. I started from one zippered end and sewed into the pouch and then all around, finishing the same way i started on the other end. Sew along the blue lines and dotted lines above, starting from the horizontal. Press seams all round.
6. Cut away the two corners, so when you turn it out, there's less bulk. Turn it out and voila!
****************************************************************************
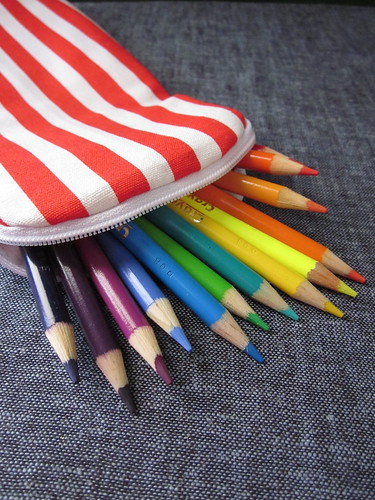
I am using this as a pencil case.
This is my new camera case/ phone pouch! Yes, it's roomy enough to fit them both!!! BAM!
I've been wanting to try a pouch this shape with a zipper enclosure.
Back then i haven't gotten over zipper phobia.
10 or more zippered pouches later, i think i am ready.
Apologies for cross-postings!
First here are all the supplies you need:
Spool of thread (your desired color)
A pair of scissors
Pins
Zipper (mine is 8")
Drafted paper pattern (mine measures 7" tall x 5.5" wide)
2 pcs of outer fabric
2 pcs of inner lining
Cut out the last 2 items from your drafted pattern.
1. Pin outer fabric and inner lining together, wrong sides together. Sew running stitch around edges. Repeat with other side. Serge or zigzag the edges to prevent from fraying.
2. Pin zipper around the rounded edge of the pouch carefully. To make sure it's centered, i marked the center of the pouch and the center of the zipper, lined them up and started pinning outwards from the center. Make sure you lay the zipper face down on the right side of the outer fabric. Sew close to zipper teeth. Repeat with other side.
3. You will end up with this when the zipper is open.
4. To prevent the zipper from catching the fabric when you zip and unzip the pouch, press and sew the edges between the fabric and the zipper on the right side, as seen above. Repeat with other side. I forgot to do it with my pouch, but i thought i'd better add in this step in this tutorial.
5. Leave the zipper open midway. Line the two sides (right sides together) so that all ends match. Pin. Carefully sew around the 3 sides that is not lined with the zipper. I started from one zippered end and sewed into the pouch and then all around, finishing the same way i started on the other end. Sew along the blue lines and dotted lines above, starting from the horizontal. Press seams all round.
6. Cut away the two corners, so when you turn it out, there's less bulk. Turn it out and voila!
I am using this as a pencil case.
This is my new camera case/ phone pouch! Yes, it's roomy enough to fit them both!!! BAM!